
I wrote previously about how, as part of prepping for my sabbatical, I’m converting a Raspberry Pi 4 with 1GB of RAM to use as my primary computer for at least the three months I’m off. If it goes well, I’ll probably continue using it to further separate work and life.
I wanted to upgrade my storage on my Pi from the 16GB card that came with the kit to 128GB. It was a little easier said than done. I ended up yanking the card out and doing a wipe and reinstall of Raspberry Pi OS. It hurt a little to start over, but I think it’ll be worth it in the long run.
Stymied by NOOBS
This card shipped with NOOBS on it. New Out Of Box Software, or NOOBS, was a tool to automatically partition and set up your Raspberry Pi on the first boot. When I bought this Pi, it seemed like a lot of them shipped with NOOBS pre-installed. The idea was to approximate the user experience of setting up other “off the shelf” devices: Install card, click a few times, wait a while, enter some passwords and viola: You had a working computer ready to go.
The problem with it was: Over time your needs evolve and NOOBS limited your ability to grow. One example: 16GB is pretty small storage for everyday computing, and NOOBS made it almost impossible to install a new card with more storage.
It’s also no longer supported, so don’t use it even if it sounds great to you. Buy a card reader and flash your SD card with Raspberry Pi Imager using another computer. It’s straightforward and well supported and documented if you get stuck. If you don’t have another computer to use, you can try the network install method. Even if it’s cumbersome, I love that there are tools out there to make this easier now. There are few OEM Linux machines, now, but you’re mostly on your own if you want to start using Linux on a machine. Tools like this and balenaEtcher have made initial setup a lot easier.
64 bit upgrade headaches
Raspberry Pi OS has a 64 bit version now. It is out of beta and ready for prime time. In theory it should spice up my life and make better use of the limited system resources. I attempted to upgrade to 64 bit on my own and it took a while but I’m pretty sure I did so successfully. From what I understand, that only really matters if you have more than 4GB of memory, but anecdotally, the 64 bit arm64 apps felt smoother and lighter even on lower end hardware. App launch, boot, multi-tasking all feel quicker.
Backups
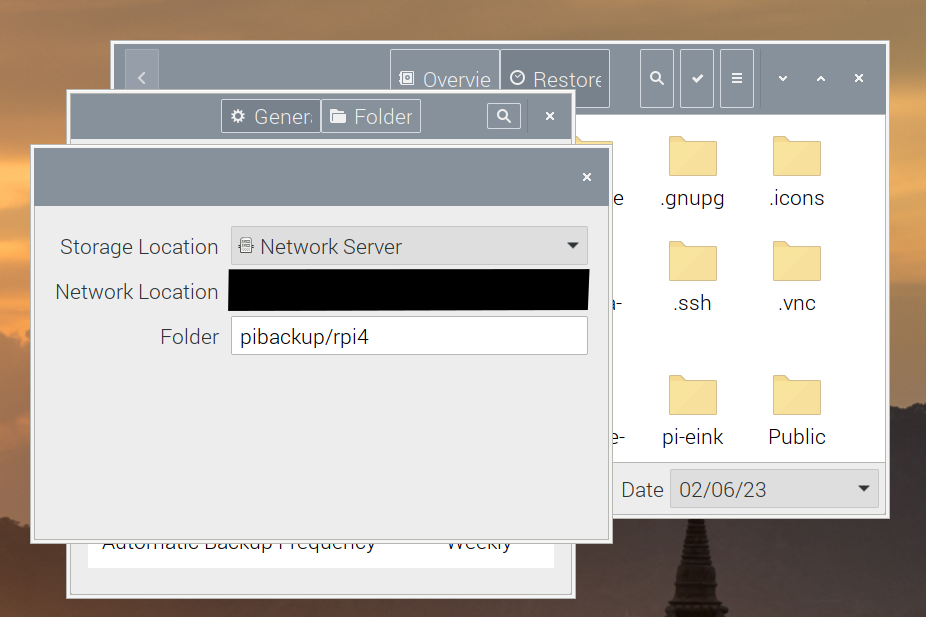
Before I began, I used gdd on my Mac to make a carbon copy of the original SD card and copied it to my NAS. Then I installed deja-dup on the Pi and made a backup of my home directory. At least this way, I could keep a copy of all the local config files, profiles, and customizations I had kicking around the previous install. It worked really well, if somewhat inconsistently. On the fresh install, I had to define the network location from the preference menu, despite being able to do it from the initial backup view in the past.
Disable hardware acceleration
On this fresh install, every browser I tried would crash the entire system basically anytime I had more than one tab open, sometimes sooner. They were extremely slow before they crashed. Upping the amount of RAM available to GPU didn’t do much. After some Googling (DuckDuckGoing?) I found Vivaldi’s documentation for improving performance. One recommendation there was to keep the Task Manager running. When I did, I noticed the GPU eating a lot of memory and processing power and I thought, “I wonder if there’s hardware acceleration on by default.” Sure enough, once I turned that off the browser was more responsive and the system stopped crashing.
I’ve also been switching back and forth between Vivaldi and Chromium, which also runs better on arm64 with hardware acceleration turned off. I suppose time will tell which ends up being the standard choice. For all the fussing I did over browsers and trying to get 1Password’s extension working, switching to 64 bit seemed to help quite a bit.
Little things
Performance: The stock setting for GPU memory was 76MB. Initially, I upped it to 128 while trying to fix my web browser performance issue. I may ned to keep adjusting this. The recommended maximum for any machine with at least 1GB, but the GUI still feels a bit sluggish at that level.
I also upped the swap limit on this device from 100 to 2048 (2GB) despite the possible risks to my SD card. I was hoping it would help offset the limited amount of RAM, even those SD storage is slower. I haven’t noticed the Pi using more than about 800MB so we’ll see if that hypothesis pans out. It seems to perform better the longer I have it in use, so that’s a good sign, I think?
Peripherals: Bluetooth connectivity seems better on this fresh install, at least so far my mouse and keyboard reconnect automatically on reboot or when waking. This is a relief compared to the hassle of swapping my trackpad between my iMac and the Pi. A neat trick, though, is that you can use Apple’s keyboard and trackpad plugged in with a USB cable on Linux without installing any additional drivers. I chose to buy a separate, mechanical keyboard for this computer, but if I didn’t mind always being plugged in over USB-A, it would work. I may also buy a cheap wireless USB mouse, too, because I think my Apple Mighty Mouse ca. 2012 or ’13 is on it’s last legs.it
Screen lock: The risks here are admittedly low since I’m basically the only one around who can use this thing, but auto-locking should help with the occasional drive-but cat if nothing else. Raspberry Pi OS doesn’t include any screensaver so you need to apt install xscreensaver, then configure the lock timing from the preferences menu. You can also add “Lock” to the main menu if you want; I haven’t yet.
My next project: I have an e-ink bonnet stuck to the GIO pins on this machine. It shows me some basic information about the machine right now, but I’m hoping to make it more useful UX augmentation. So far, though, following the installation instructions from scratch has failed to start this bonnet. I may need to just uninstall everything and start over from scratch.
Still beats buying new computers
All things considered, I’m still happy with the decision to use this Raspberry Pi rather than buy some cheap Windows laptop or try to use my work machine but not check in on work while I’m out of the office. It’s also more sustainable to use a computer you already have. Especially given how small and simple this computer is, if I can keep using it to avoid buying something new, that works for me.
So far, this been an instructive experience to help me appreciate everything that goes into making a commercial, general use, operating system. For all the griping I do about bugs in Mac OS, I have a better appreciation now for how well MacOS does anything out of the box.
Mac OS and Windows excel by giving you things most people will want out of the box: Screensavers, decent basic photo and right text editors, backup management, complex mouse interactions, often pre-tailored for the system resources it has available. There’s a lot less tinkering required by design.
Linux is an answer to that idea of completeness that says you should have freedom to decide how you work and what you need. Some distributions, like Ubuntu, ship closer to “complete” than others but you still have those freedoms baked in. Raspberry Pi is meant to be an affordable computer that basically works for a broad range of uses. At that, it really succeeds. For the most part, you can just plug it in and get going — especially if you have a higher end model. It’s not hard to get started, and it’s a good introduction to tinkering and how software makes hardware do useful or convenient things.